Sharing all your Music, Photos, Movies, Storage, and more with your family members who use Apple Devices like iPhone, iPad, iPods, etc sounds beautiful and why wouldn’t one like to have this option for their family? Well, Apple introduced Family Sharing Feature with iOS 8 Update in 2014 which was designed to make sharing your content with your family members more convenient. You can share all your purchased Apps, Games, Movies, Music, etc with a family of 6 without purchasing it again or sharing your Apple ID with Your Family Members.
Before Family Sharing was introduced, you had to share your Passwords and Apple Id both which is both insecure and inconvenient. But now, Family Sharing has bought up sharing Apple Music & Cloud Storage Subscriptions without buying it again and again for your family members saving you a lot of money to buy another iPhone xD.
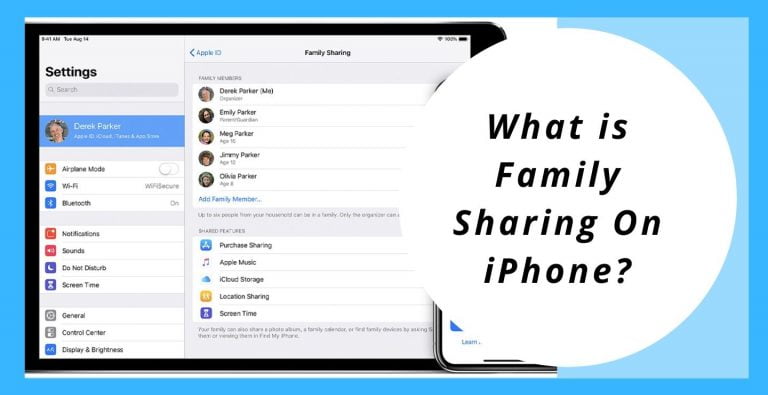
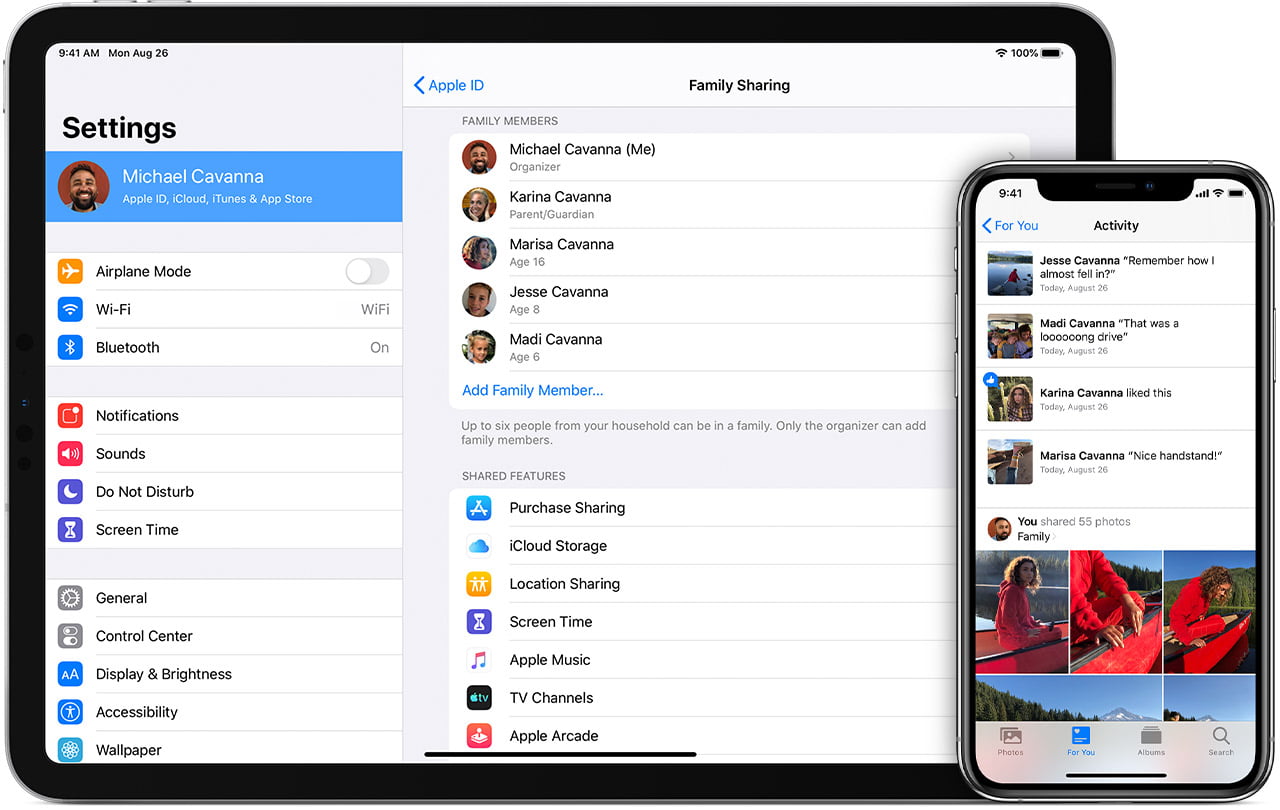
How the Family Sharing Works?
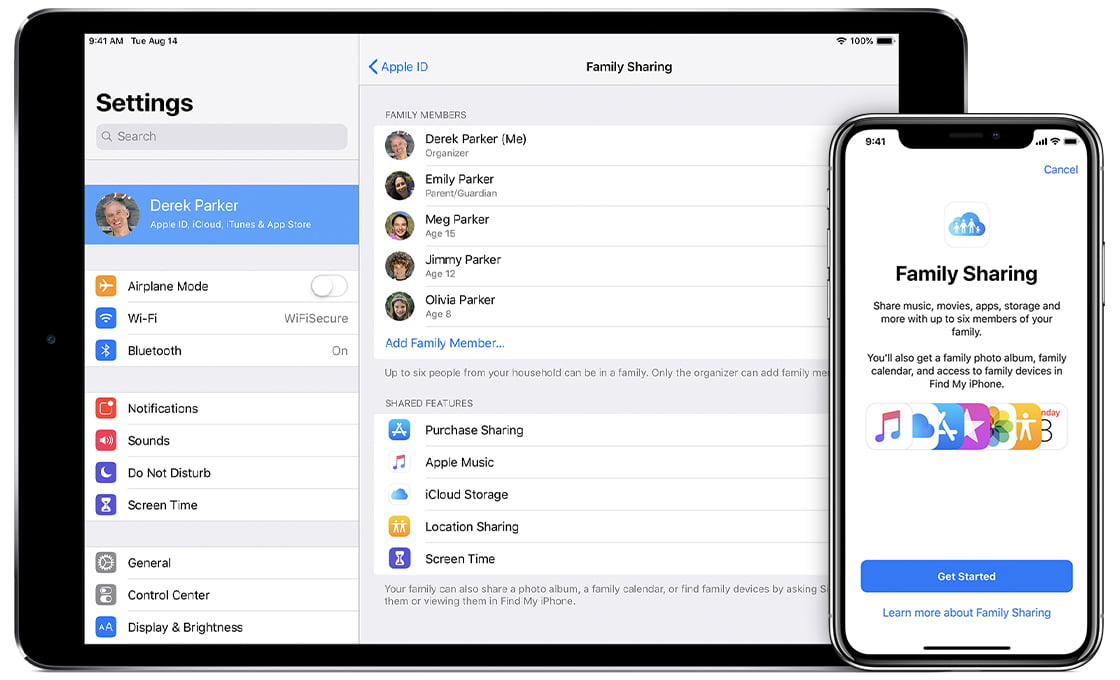
Family Sharing makes it easy for a family of 6 to share all their iTunes, App Store, Movie, TV, Books, etc Purchases with each other and also allows you to share your Apple Subscriptions like Apple Music Family Subscription, Apple News + Subscription, Apple iCloud Subscription, And An Apple TV + Subscription amongst your family without sharing each other’s Apple ID’s & Passwords.
Family Sharing on Apple Also allows you to set up your Kid’s Apple ID, Enable Parental Controls For Kids and set Screen Time Permissions Remotely, Review Or Approve Purchases on Kids Device, Share Locations and Locate Lost Device And many more other Parental Control Features which allows you to keep a check on your kids always!
With Family Sharing Enabled, you can also share Pictures, Videos, Audio Files, Reminders, Notes, and even calendars amongst your family members, without sharing your Private Data! Great Isn’t it?
Family Sharing Requirements!
Family Sharing In Apple Sure has Some Requirements and Limitations which makes it The Best amongst all!
- All the Devices in the family must be running on iOS 8 or higher or OS X Yosemite or Higher in MAC’s.
- Maximum 6 Members can join an Apple Family.
- If Purchase Sharing is enabled, then the family organizer’s Payment Method will be used in all devices for purchases,
- You can’t enable Purchase Sharing for An Adult Family Member ( Any member above 18) and it is automatically enabled Purchase Restrictions for kids ( Under 13).
- The Family Organizer can only create and Delete 2 Family Groups Per Calendar Year, i.e, If you Make and Delete a Family group, then you can repeat the same one more them. After that you’ll have to wait for a Calendar year to make or Delete Family Groups.
- Each Family Member can be in One Family Group at a time.
- Obviously! You’ll need an Apple ID and an iCloud Account to enable Family Sharing
How To Set Up Family Sharing on iPhones & Mac’s?
On iPhone, iPad, iPod:
- Go-to Settings App on your Device, Tap open your Name. If Using iOS 10 or older, Go-to Settings App, then tap on iCloud.
- Choose Setup Family Sharing, then click on Get Started and follow the instructions on the screen to set up and invite your family members.
- If you’re using iOS 11 or later, then go-to the first feature you’d like to share with your family members and then continue following the on-screen instructions to invite your family members.
On Mac:
- Tap on the Apple menu icon, then go to System Preferences, then choose family Sharing & If you’re using macOS Mojave or earlier, then go to the Apple Menu, then select System Preference and then click iCloud.
- Now enter and confirm the Apple ID which you want to use for Family Sharing and enable Share My Purchase.
- And now follow the On-Screen Instructions.
How to Invite People to Your Family?
On iPhone, iPad, iPod:
- Go to the Settings app on your device, now click on your name then go-to Family Sharing. If you’re using iOS 10.2 or earlier, go to Settings, iCloud, and then Family.
- Tap Add Family Member. Enter your family member’s email address or name and follow the onscreen instructions.
- If you’re using iOS 11 or later, choose how you’d like to send an invitation via Message or to invite them in person and then follow the instructions on the screen.
On Mac:
If you’re using macOS Catalina:
- Open the Apple menu, then System Preferences.
- Click Family Sharing
- Click Add Family Member, and then follow the onscreen instructions.
If you’re using macOS Mojave or earlier:
- Choose Apple menu, open System Preferences, then click iCloud.
- Click Manage Family.
- Click on the add family member button (+), then follow the onscreen instructions.
Now if you want to check that the family member has accepted your invite or not, then open the Manage Family Page on your iPhone, iPad, iPod, or Your Mac and then select the person’s name and check from there whether the invitation is accepted or not.
How to Join a Family?
If someone invites you to their family, you instantly receive an iMessage or an email from where you can directly Accept or Decline the invite. But what if you don’t receive any email or Message? So in that case, you can follow these steps to Check Invitation sent to you:
On iPhone, iPad, or iPod:
- Open the Settings app. Click on your Name and then goto Invitations.
- If you’re using iOS 1.2 or older, then go to Settings, then open iCloud and then click on invitations.
On Mac:
- Open Apple Menu, Click on System Preferences then click on Family Sharing.
- If you’re using macOS Mojave or older, then open Apple Menu, Click open System Preferences, then iCloud and then Click on Manage Family.
Now follow the on-Screen instructions to accept the invitation. Keep in mind you can only join one family at a time and switch family once per the calendar year.
What is Purchase Sharing?

When any family member makes any purchase on Apps Store, iTunes, etc, or makes a payment for any subscription like Apple Music, Apple TV, etc, it’s billed to the Family Organizers Account. And once the Family organizer pays for it, its added to the family members’ account, and the transaction receipt is directly sent to the Organizer.
And in case a family member leaves the group the Family Group is deleted, then each member gets to keep their purchases, even though they were paid by the Family Organizer.
How to enable Or Disable Purchase Sharing?
- Open Settings App, Tap on your name
- Open Family Sharing
- Select Purchase Sharing Option
- Now Toggle ‘ Share My Purchases’ off
What is Ask-To-Buy?
Purchase sharing also gives an Additional feature called Ask-to-Buy which is by default enabled for Kids under 13 and can be manually enabled for kids Under 18. Ask-to-Buy feature cannot be used on Adults or Any Member above 18.
When Ask-To-Buy is enabled, Kids cannot directly make any purchase, they first have to send request permission to the family organizer where the organizer gets a notification on their device and then they can see what the kid wants to buy and can accept or decline the purchase.
The organizer must give permission to the kid before he can buy anything from iTunes, App Store, Movie, etc.
If you turn off Ask-To-Buy Feature for a family member who turned 18, then it cannot be enabled again.
How to enable Ask to Buy on iPhone, iPad, iPod:
- Open Settings App, Tap on your name
- Open Family Sharing
- Select A Family Member’s Name
- Now enable Ask-To-Buy
How to enable Ask to Buy on Mac:
- Open Apple Menu, Click on System Preferences then click on Family Sharing.
- If you’re using macOS Mojave or older, then open Apple Menu, Click open System Preferences, then iCloud, and then Click on Manage Family.
- Select A Family Member’s Name
- Now enable Ask-To-Buy
I hope that I could explain Apple’s Family Sharing to you. For more information, queries, etc, you can Comment Down below or Visit www.support.apple.com